Deploying a Static Site to Digital Ocean’s App Platform
I recently moved this site from Netlify to Digital Ocean's App Platform to keep all my sites together. Even better, Digital Ocean offers 3 free static sites on its app platform. If you're looking to deploy a static site using their app platform, read this article to learn how.
Digital Ocean's App Platform
Digital Ocean released its "App Platform" which is a managed infrastructure system similar to Heroku. You can set up your "app", database, workers, and more without needing to set up and maintain the underlying infrastructure.
As someone who tries to avoid maintaining infrastructure, I have started using their app platform for several of my recent projects, such as my proof-of-concept for LiteSurveys.
Each "app" you set up has its own pricing plan and has different "components" which are the different pieces of your site. For example, on a recent project, I had a Fast API app as the main component and a Redis queue worker as another component.
On their "starter" plan, you can have up to 3 static sites for free.
Preparing Your Code
For this site, I use the Pelican static site generator. The process will be mostly the same if you use a different static site generator except you may tweak the build step.
The app platform uses buildpacks to create the environment. It detects which to use depending on your code. These buildpacks will build the container and install all of your code's dependencies.
Add a Requirements File (or Similar for Your Code)
First, we want to make sure we have our requirements.txt file added to our project. This is a standard file in Python projects to ensure that the environment the script is run in contains all the dependencies needed.
If you are using another language, such as JavaScript, you'll add the similar requirements file, such as package.json, needed for your code's environment.
Digital Ocean will install the dependencies (specifically Pelican) when deploying, so it's important we have this file.
The file itself only needs to have pelican, but you may need to add others if you have added other packages for running your site.
pelican[Markdown]
Setting Up Your GitHub Repo
In order to continuously deploy your site over to the app platform, you will need to set up a place for it to pull the code from. The easiest way is to set up a GitHub repo. The app platform can also pull from a GitLab repo or from the Digital Ocean Container Registry.
Since we will be building the files when deploying, you do not need to commit the output or built files.
Creating Your App
If you do not have a Digital Ocean account, you will need to create one first.
Consider using my referral link to get a $200 credit in your account for other projects.
Once you have your account, log in and go to the Apps page.

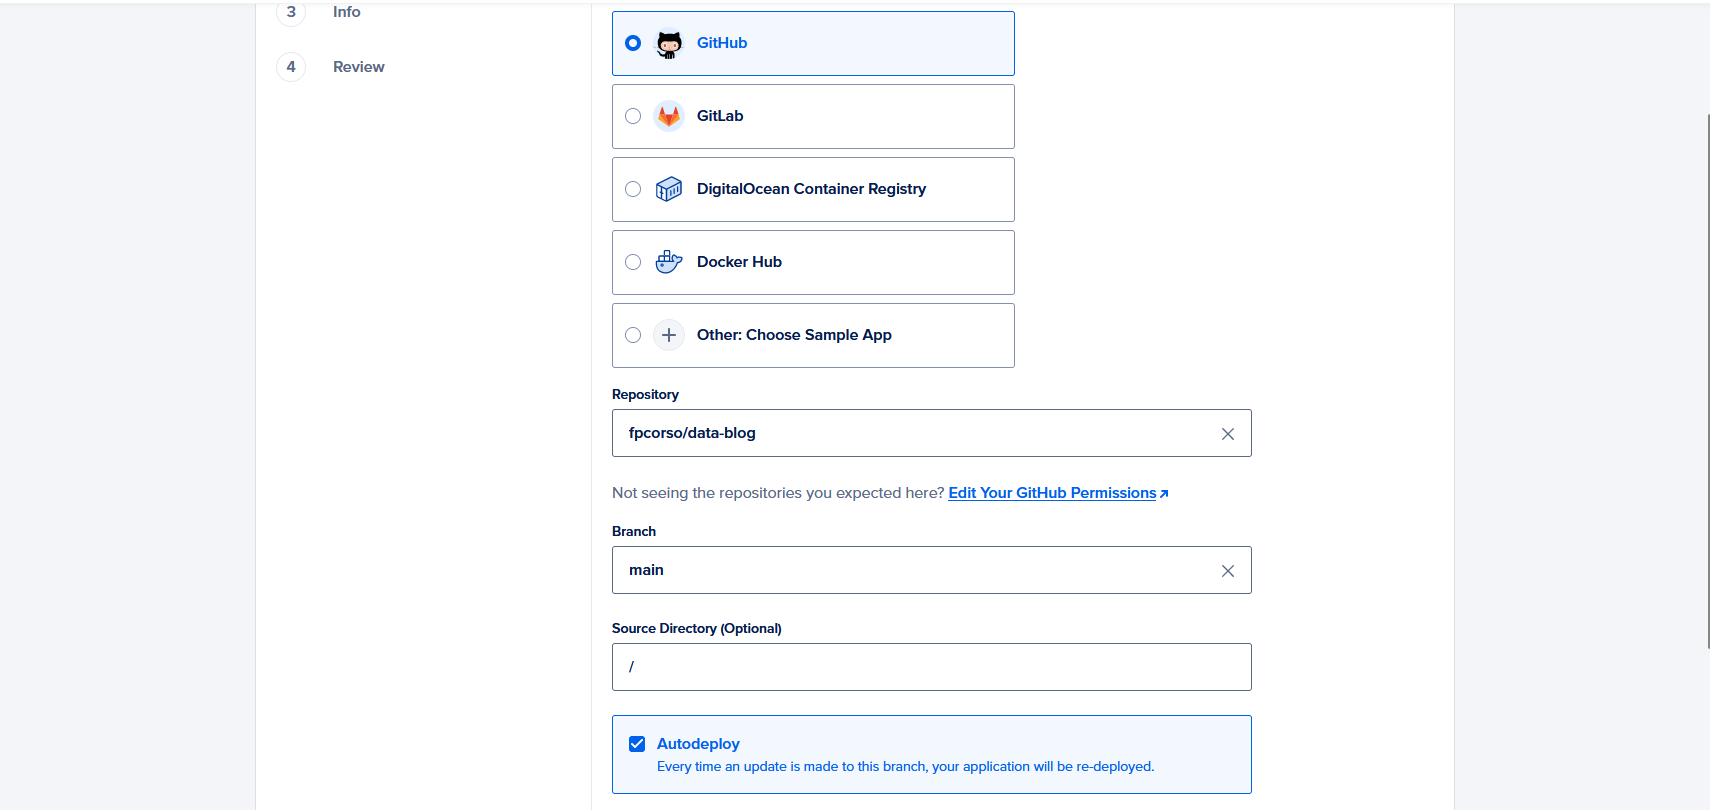
On the apps page, click to create your first app. On the first page in the setup wizard, select where your code is. You may need to connect your GitHub (by choosing GitHub) or clicking to edit GitHub permissions if you've connected it before with different repos.
Once you have selected a repo, you will need to select which branch to deploy from and whether to auto deploy or not. For me, I keep auto deploy on for sites like this.
After clicking next, you will see a screen showing "resources" for the app, which will include only the main component right now. However, this will normally default to a web service instead of a static site, so we need to change that.
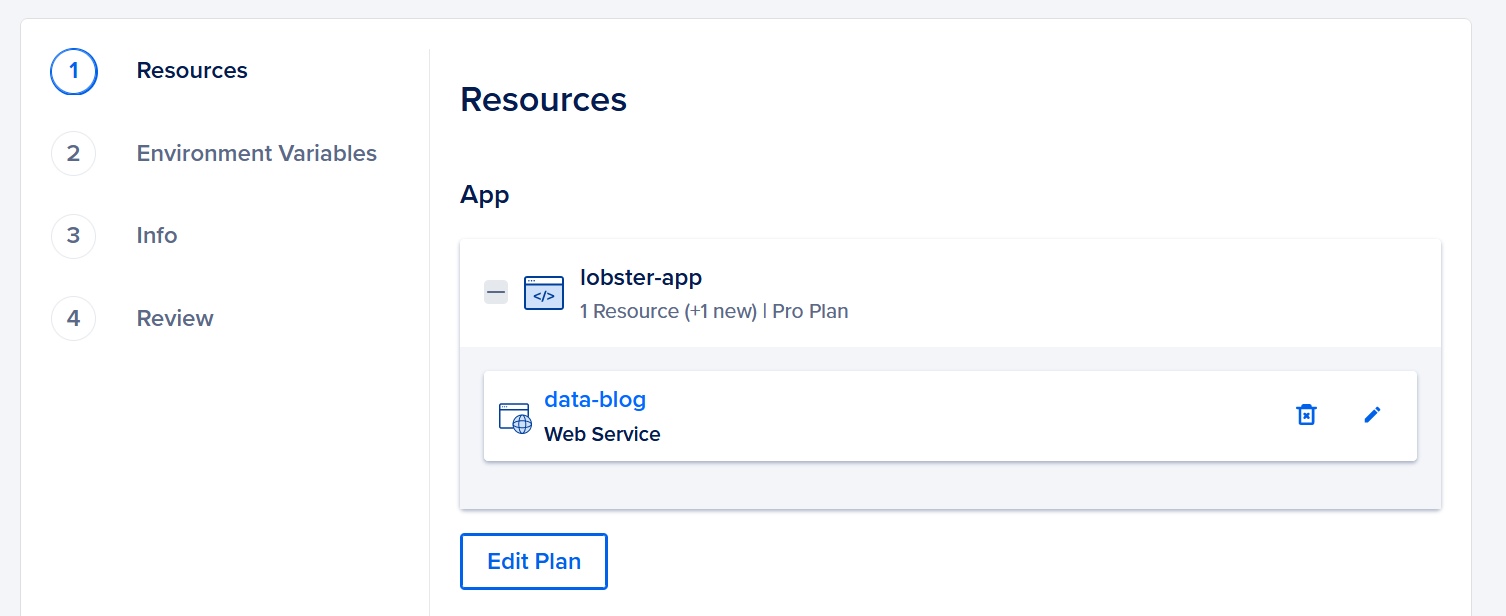
So, click on either the component name or the edit icon on the component (named data-blog in the screenshot). There are three main steps we need to take here.
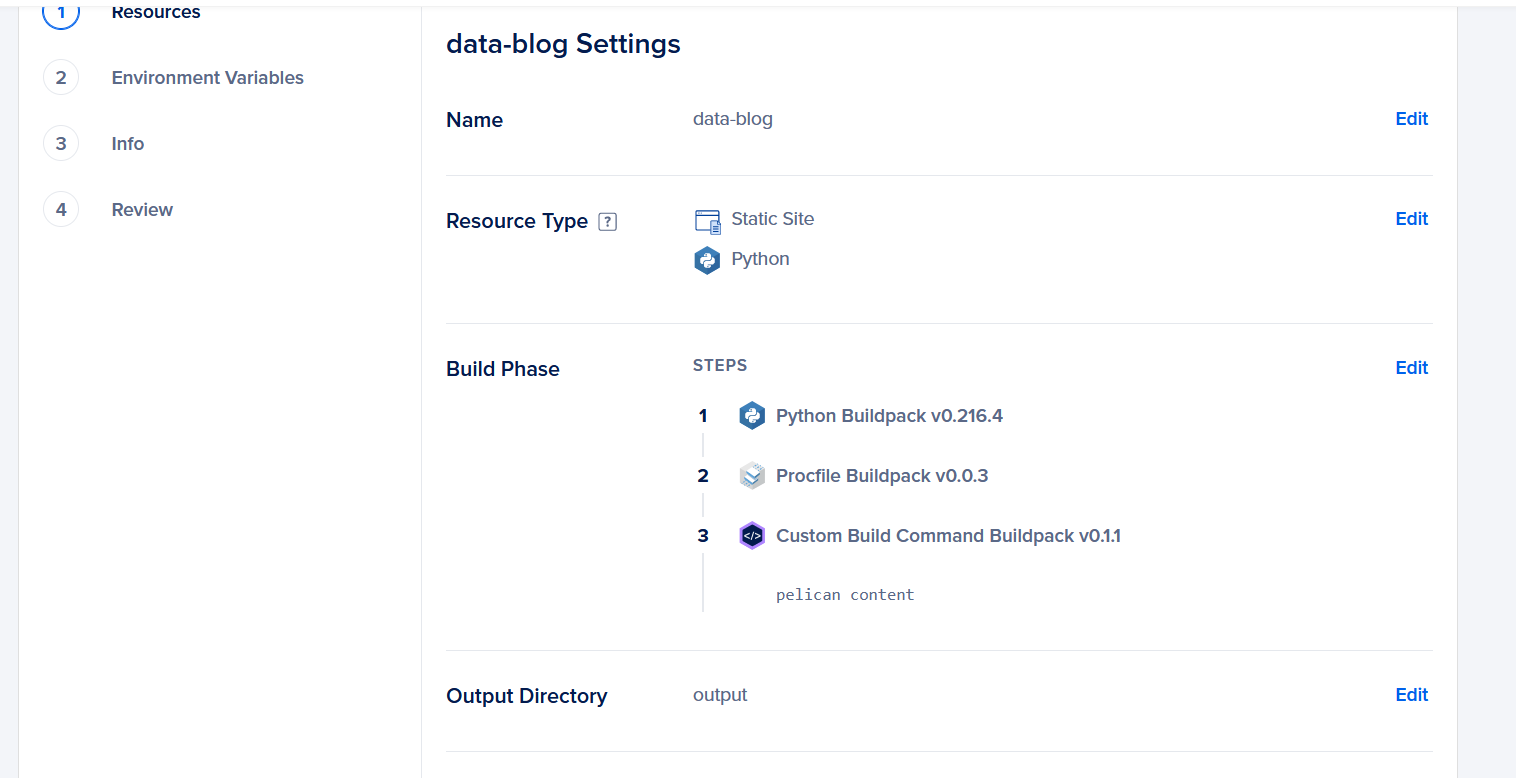
First, click edit on "Resource Type" and switch it to "Static Site."
Second, click edit on "Build Phase" and enter the build command for your generator into the "Build command" textbox. In my case, it was pelican content. While you're here, double-check the buildpack to make sure it's the correct language (such as Python or JavaScript).
Third, click edit on "Output Directory" and enter the directory your site generator builds to. In my case, it was output.
Once everything looks correct, you can click to go back. Then, click next on the resources page and then again on the environment variables page unless you have some to enter.
On the "Info" step, update your app name to something easier to identify what this is. This will be the name you see in your list of apps and projects so keeping the randomly generated name can make it difficult to find in the future if you have other apps or projects. Then, click next.
You should now be on the "Review" page. Look over the details to make sure the "Starter plan" is now shown and that your component is a "Static site". At the bottom, it should show the monthly cost as $0.00.
If everything looks correct, click the "Create Resources" button to create your app.
Depending on the size of your site, it may take a few minutes to set up your app and site. It will then begin building your site for the first time.
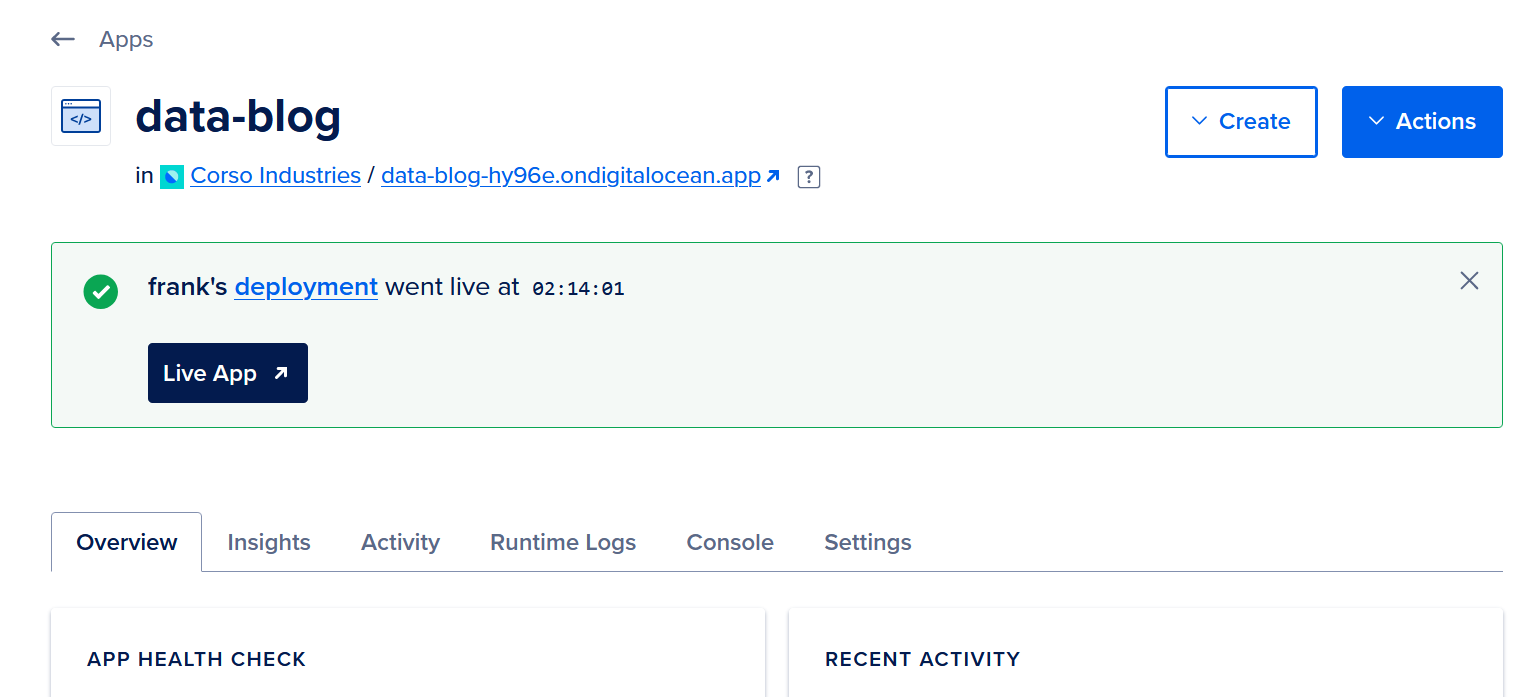
Your site is now deployed! You can access the site by clicking the "Live App" button in the message or the URL just under the app's name.
If you set it up to auto deploy, any time you push a change, you will see a new build appear in the site overview. Once built, you will automatically see your changes go live.
Next Steps
There are a lot of things you can do from here, but a few steps I recommend next would include:
- Using the "Settings" tab to adjust the "Domain" settings to point a custom domain to your site instead of using the autogenerated one. (See Digital Ocean's docs on domain management)
- Using the "Settings" tab to adjust the "Alert Policies" settings to receive notifications on failed deployments
Now, go share your deployed site with the world!
Similar Articles
Deploying Your Pelican Static Site To Netlify
Ready to deploy your static site built by Pelican? Learn how to deploy to Netlify!
Setting Up Pelican Static Site Generator
Interested in setting up a static site using Pelican? Check out how I set up this site!