Using AWS Glue to Convert CSV Files to Parquet
AWS Glue has a variety of features, but one of the most useful is its fully managed ETL service. You can do many things using its ETL jobs, including transforming, joining, and moving data.
Glue can also work with a variety of data stores, including Amazon S3, Amazon Redshift, Amazon RDS, and Amazon DynamoDB. Even better, it can use data connectors to integrate with other data stores, such as Snowflake.
In this post, I'll create a simple ETL job that reads CSV files from a s3 bucket, drops a few of the columns, and writes them to a parquet file in another s3 bucket.
I have already created two s3 buckets to be used in this and uploaded a CSV file into one of them. If you plan to follow along, you will also want to set up your s3 buckets.
Creating IAM Role for AWS Glue
Before we can create the job, we need to set up the IAM role that Glue will use when running the job. The job will assume this role while running, similar to Lambda's execution role. So, this role will need any necessary permissions needed to access the different services. If you've used Glue before or already followed its steps for creating a default role, you can skip this section.
On Glue's most recent design change, it now has a "Prepare your account for AWS Glue" option on the main page, which can create the role as well as do many other things. To get started, log into AWS and go to AWS Glue.
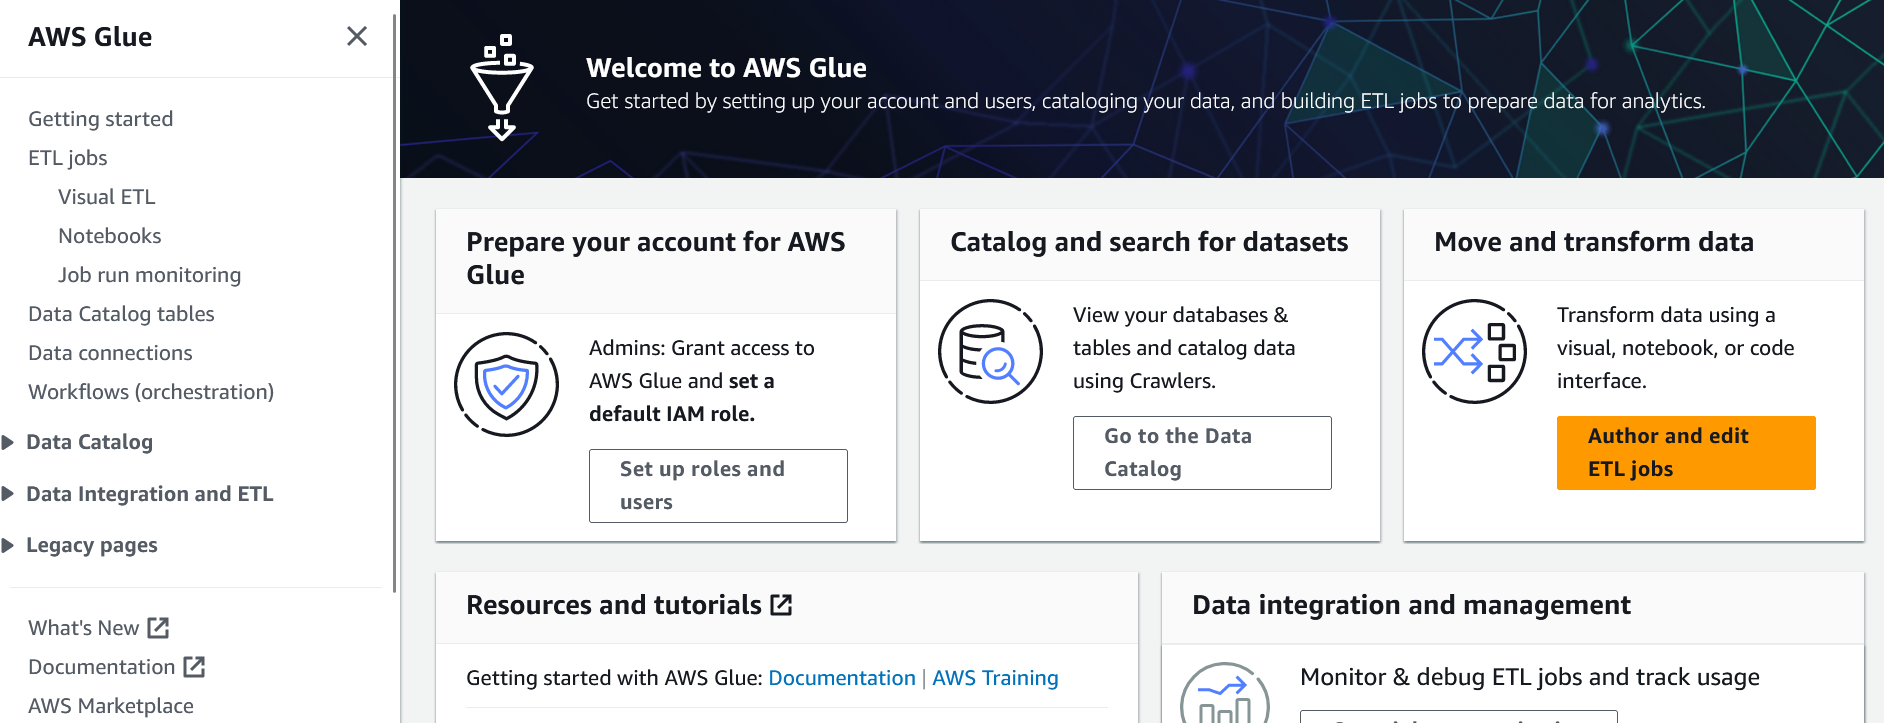
On the main page, click the "Set up roles and users" button.
Since we are not setting up other users to use Glue, we can skip the first two steps without making changes. So, click "Next" until you reach the "Choose a default service role" step.
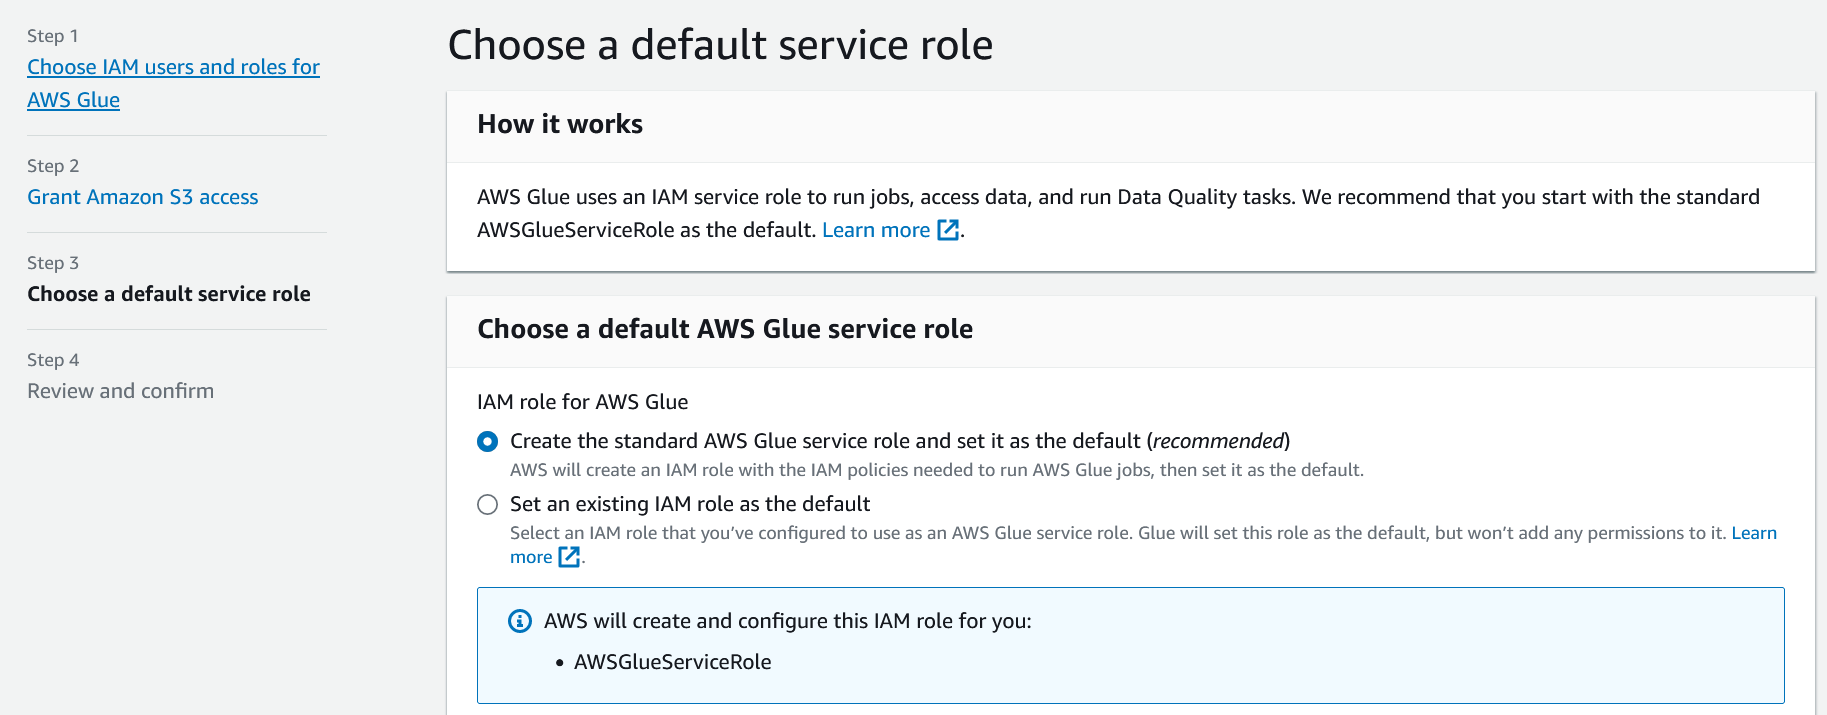
On this step, make sure the "Create the standard AWS Glue service role and set it as the default (recommended)" option is selected. This will create a new IAM role called "AWSGlueServiceRole" and attach permissions for Glue, s3, Cloudwatch, and a few other services to it.
Click "Next" to go to the "Review and confirm" screen and then click "Apply Changes." After a few moments, you'll see a success message at the top of the screen.
If you glance at the IAM console, you'll see a new role called "AWSGlueServiceRole" with the "AmazonS3FullAccess", "AWSGlueConsoleFullAccess", and "AWSGlueServiceRole" permissions attached to it. There will also be a new policy created and attached to the role. The role is now ready for most simple ETL jobs.
Creating the AWS Glue Job
Now that we have the role created, we can create the job. For this job, I will be using a CSV file containing data on the Fortune 1000 companies that we want to change to Parquet format while removing some columns we do not need.
To get started, go back to the AWS Glue console and click the "ETL jobs" link on the left side of the screen.
At the top of the screen is a "Create job" section, which includes several different options. For most simple ETL jobs, you can use the "Visual with a source and target" option. If you click on the source or target, you will see some of the services and systems that AWS Glue can work with.
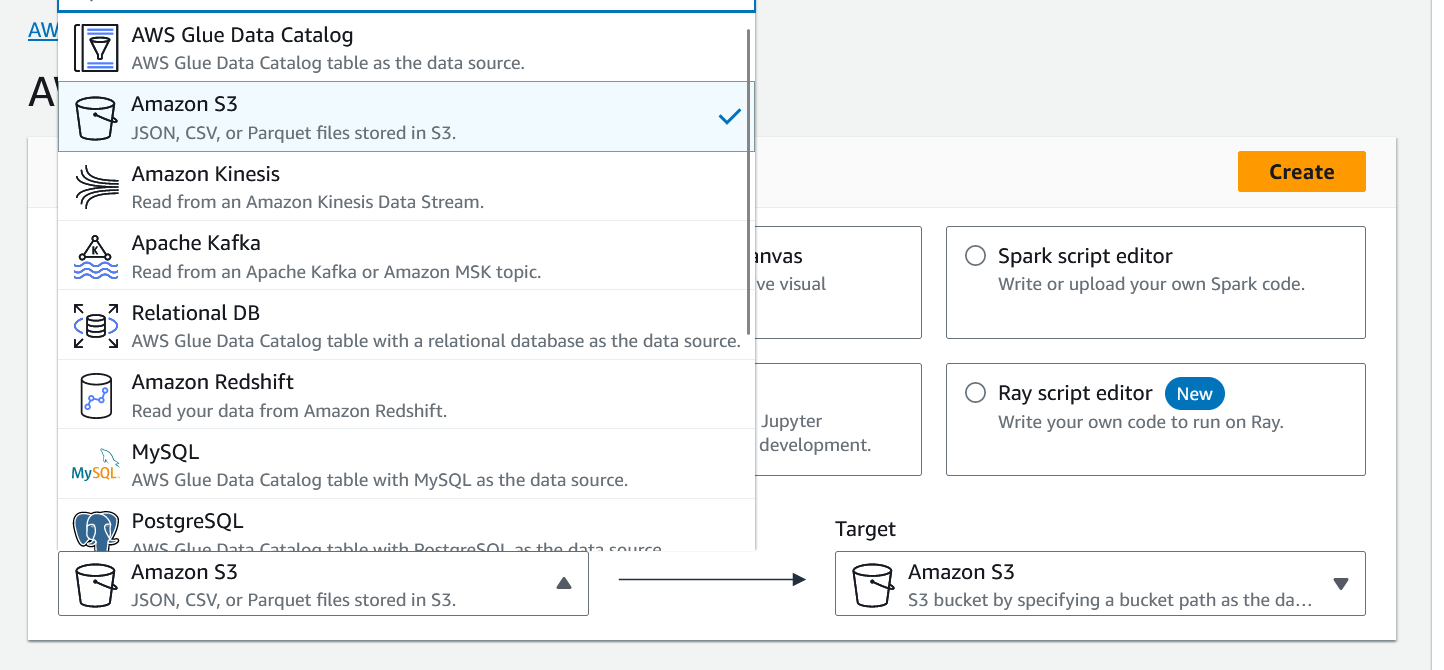
Ensure the source and target are set to "Amazon S3." Then, click the "Create job" button. This will take you to the visual editor.
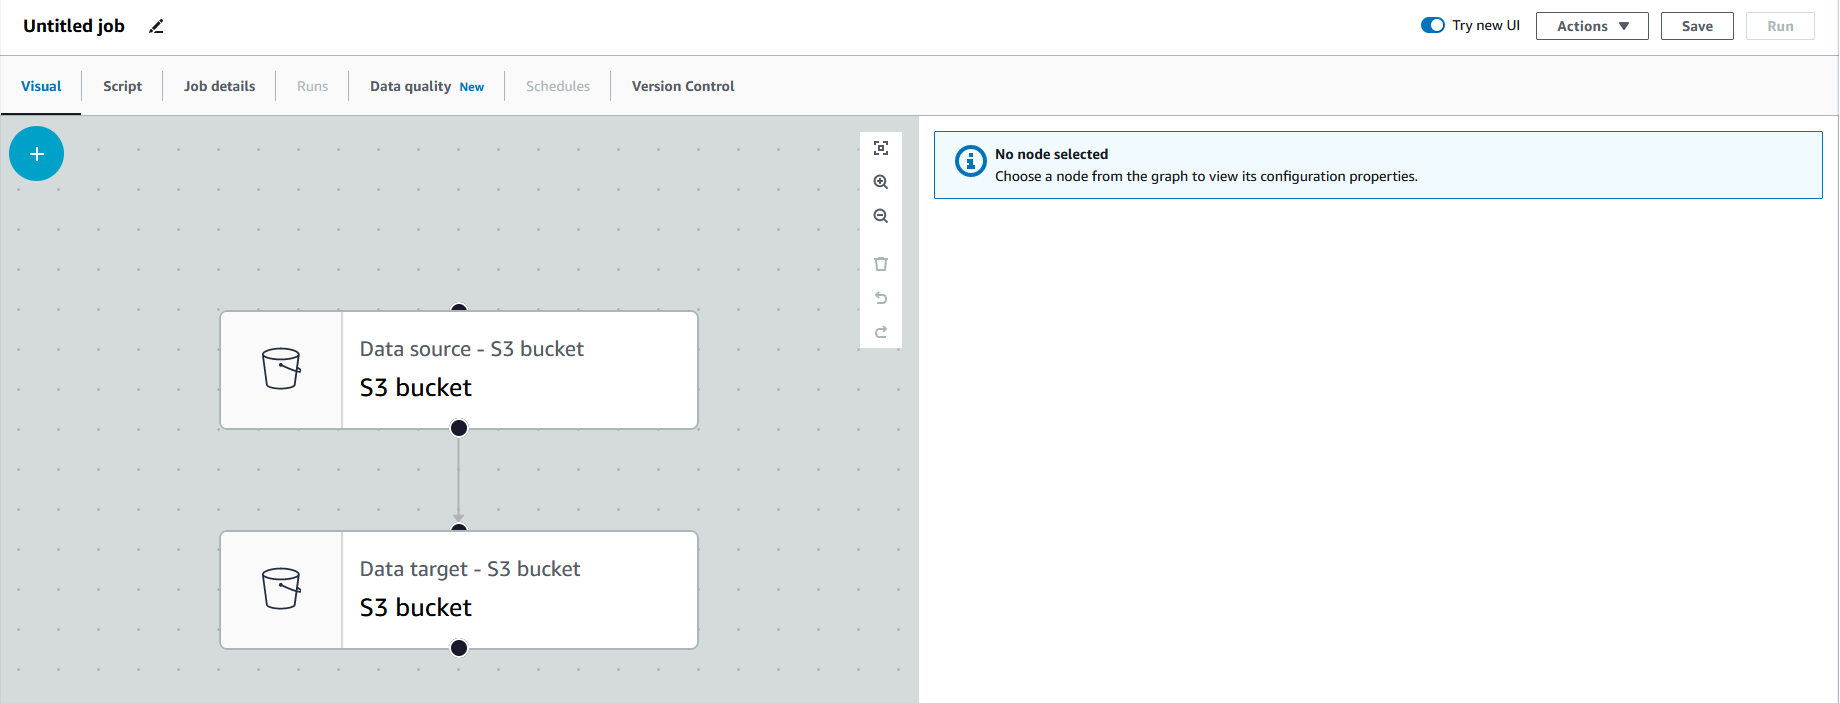
Creating the Nodes
Each object and step in the job are referred to as "nodes." You can have 1 or more source nodes and 0 or more transform nodes. To add a node, you can click the "+" button. Before we do that, let's first set up our source.
Click on the "Data source" node, which will open the node's properties. Scroll down to the "S3 URL" option and click "Browse" to find and select the S3 bucket the CSV files are in.
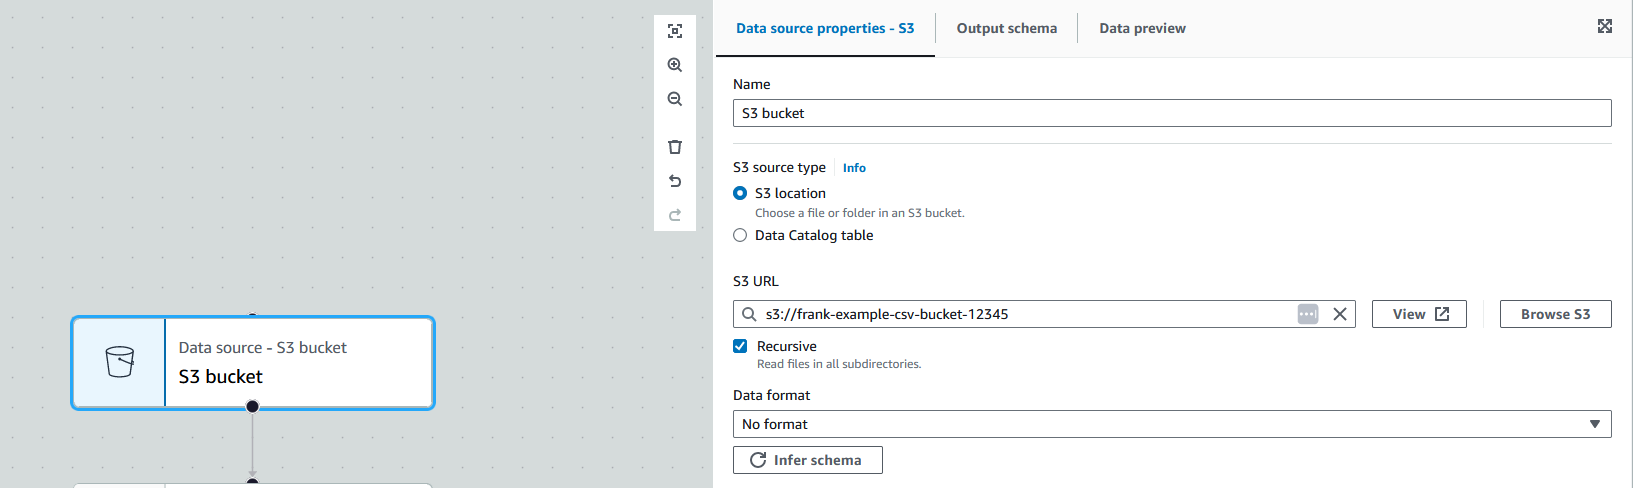
Then, under "Data format", you can fill in details about how the file is structured. Alternatively, you can click "Infer schema" which loads in a sample file from the bucket and detects its structure. That is what I will do for this job. After a few seconds, it will populate the format options.
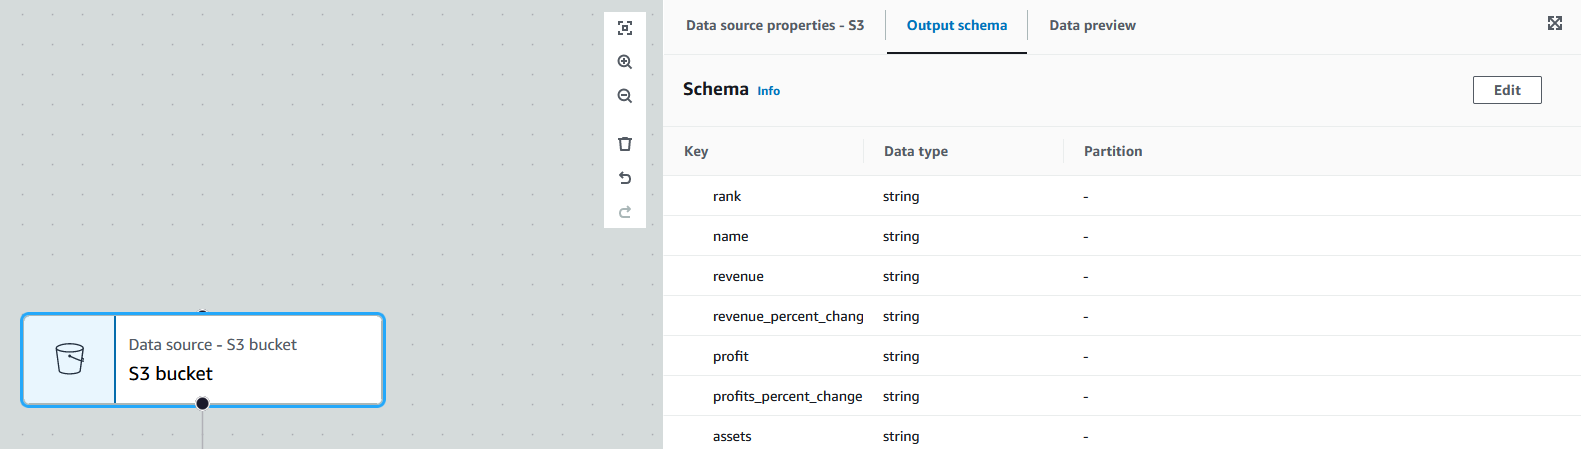
We can then switch to the node's "Output schema" tab to see the detected schema to make sure everything looks correct.
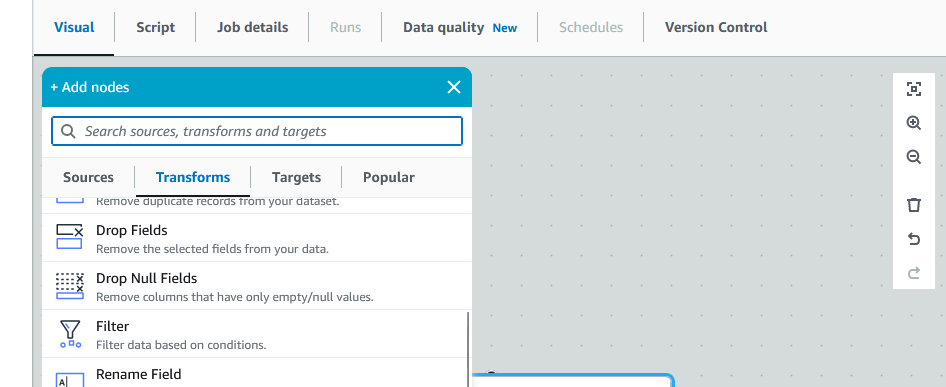
Now that our source is set up, we can add our transform to drop the columns we do not need. Click on the "+" button, switch to the "Transform" tab, and select the "Drop Fields" option. This will add in our transform node.
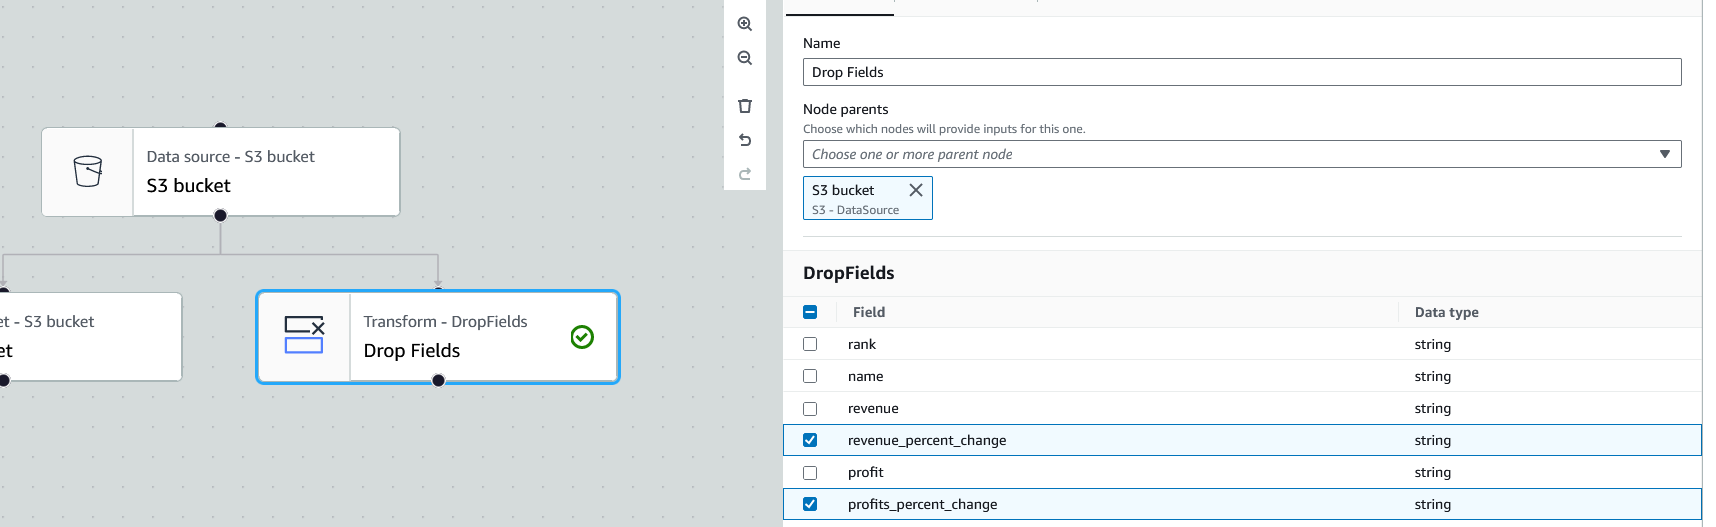
Click on the new transform node to open its properties. Make sure the "Node parents" option is set to the data source node. Then, underneath the "DropFields" section, we can select which columns we want to drop. For this job, I will drop the columns related to year-over-year change. To do so, click the checkbox next to each column to be dropped.
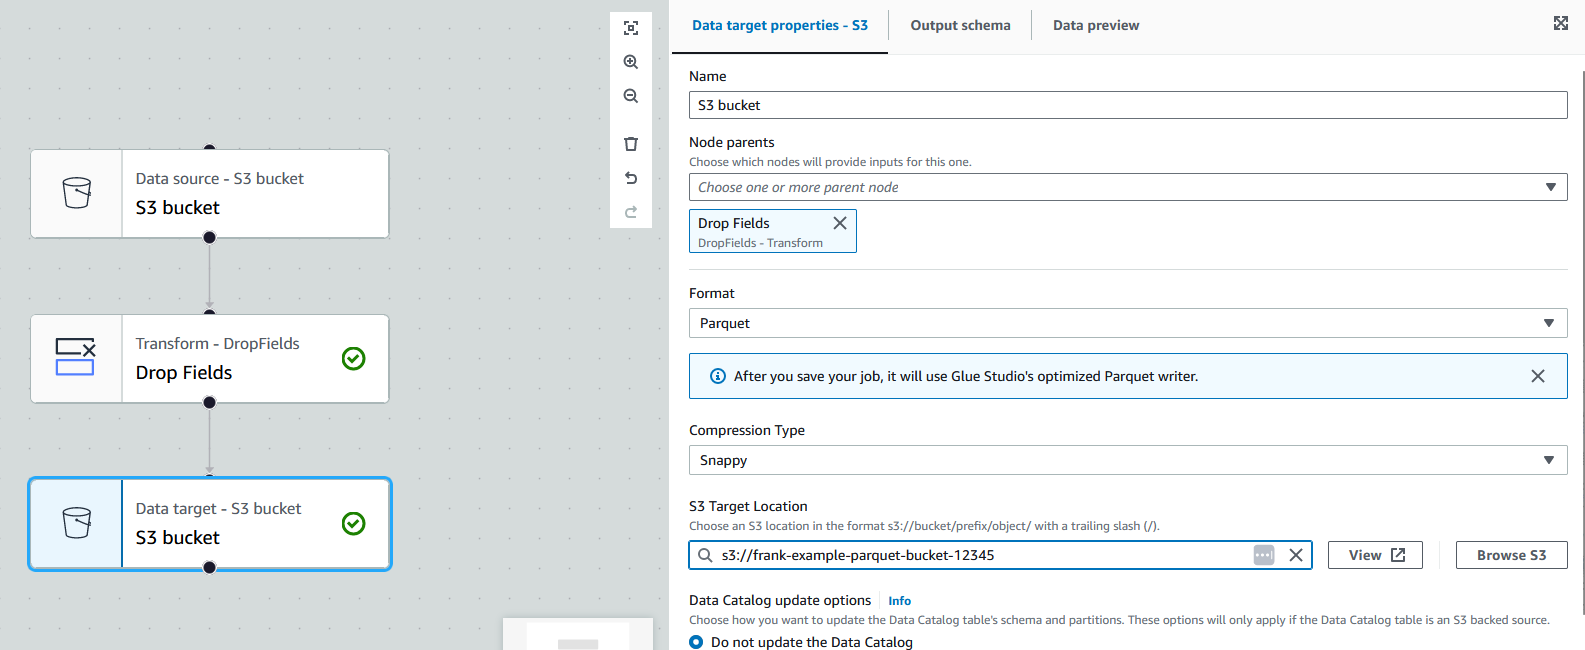
Lastly, click on the "Data target" node to open its properties. First, switch the node parent to be the transform node instead of the source node as we want all data to go through the transform. Next, under "Format", select the Parquet format. Then, scroll down to the "S3 Target Location" option and click "Browse" to choose the s3 bucket to write the Parquet files to. I will use the defaults to all the other options for this job.
Adjusting the Job Details
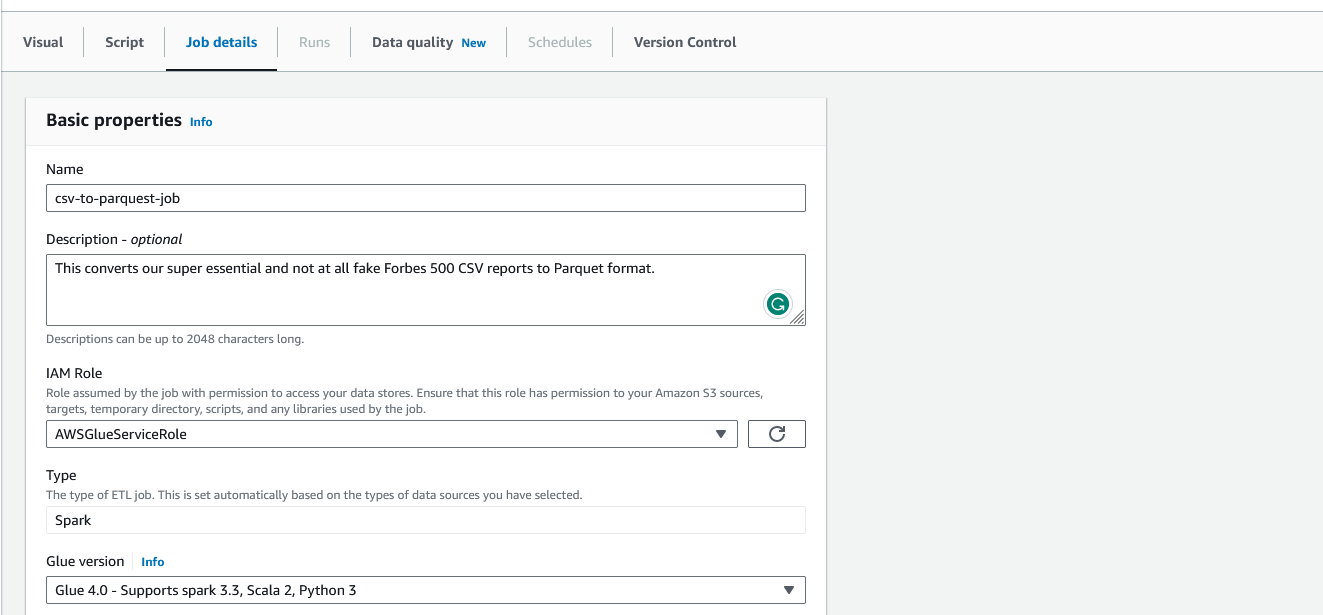
Now that we have our nodes set up, we can adjust the job details. Click on the "Job details" tab to open the job's properties. First, we can change the name of the job to something more descriptive. Then, we can adjust the job's IAM role. By default, it will use the "AWSGlueServiceRole" role we created earlier. If you want to use a different role, you can select it from the dropdown.
Scroll down and open the "Advanced properties." Check to make sure the "Script filename" does not have any spaces. Glue will auto-fill this in based on the job's name and will throw an error if the filename has spaces.
We can keep the rest of the options as their default values. However, there are two options I want to highlight as they will come in handy in your future jobs.
First, is the "Job bookmark" option. When enabled, the job will remember which files it has already processed. So, if the job is run again, it only processes new data since the last checkpoint. For this job, I will leave it disabled.
Second, if the "Flex execution" option is enabled, the jobs run on spare capacity in AWS. This is great for saving some money on non-urgent jobs. For this job, I will leave it disabled.
Once you are all finished, click the "Save" button in the top-right corner.
Running the Job
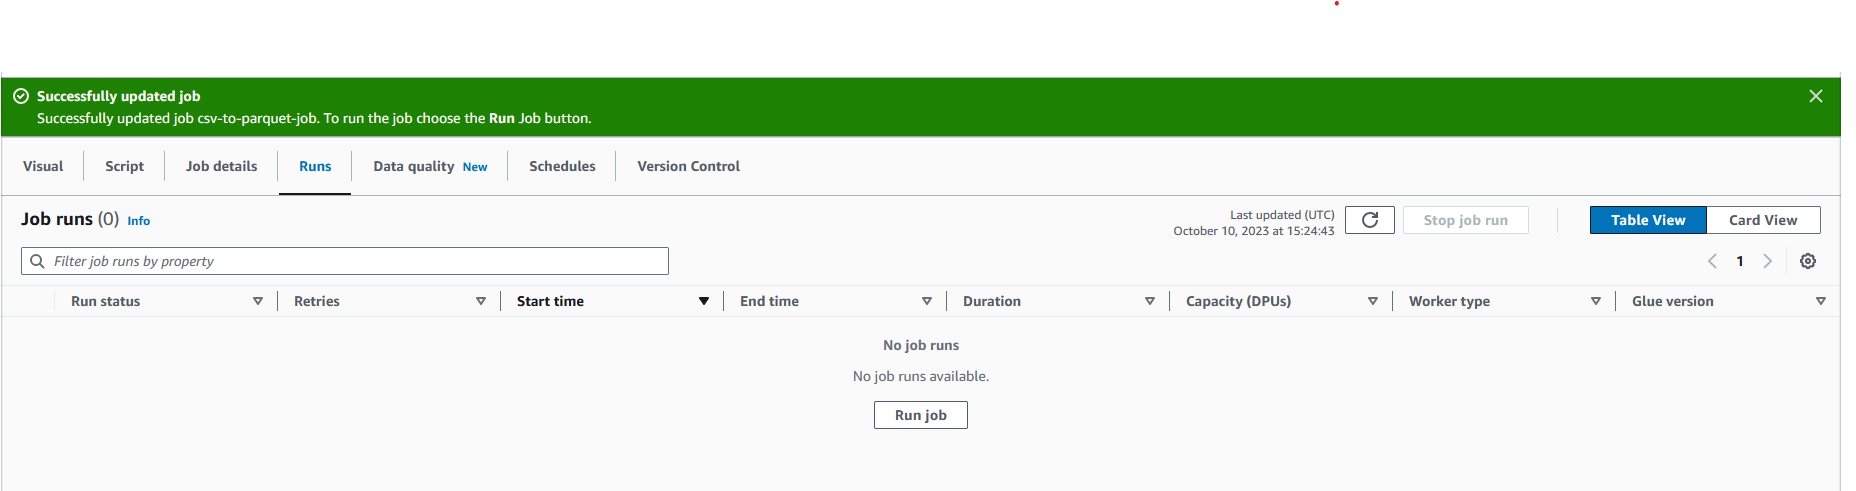
Once the job is saved, we can now switch to "Runs" on the job. At first, this table will be empty. Let's start our job. Click the "Run job" button.
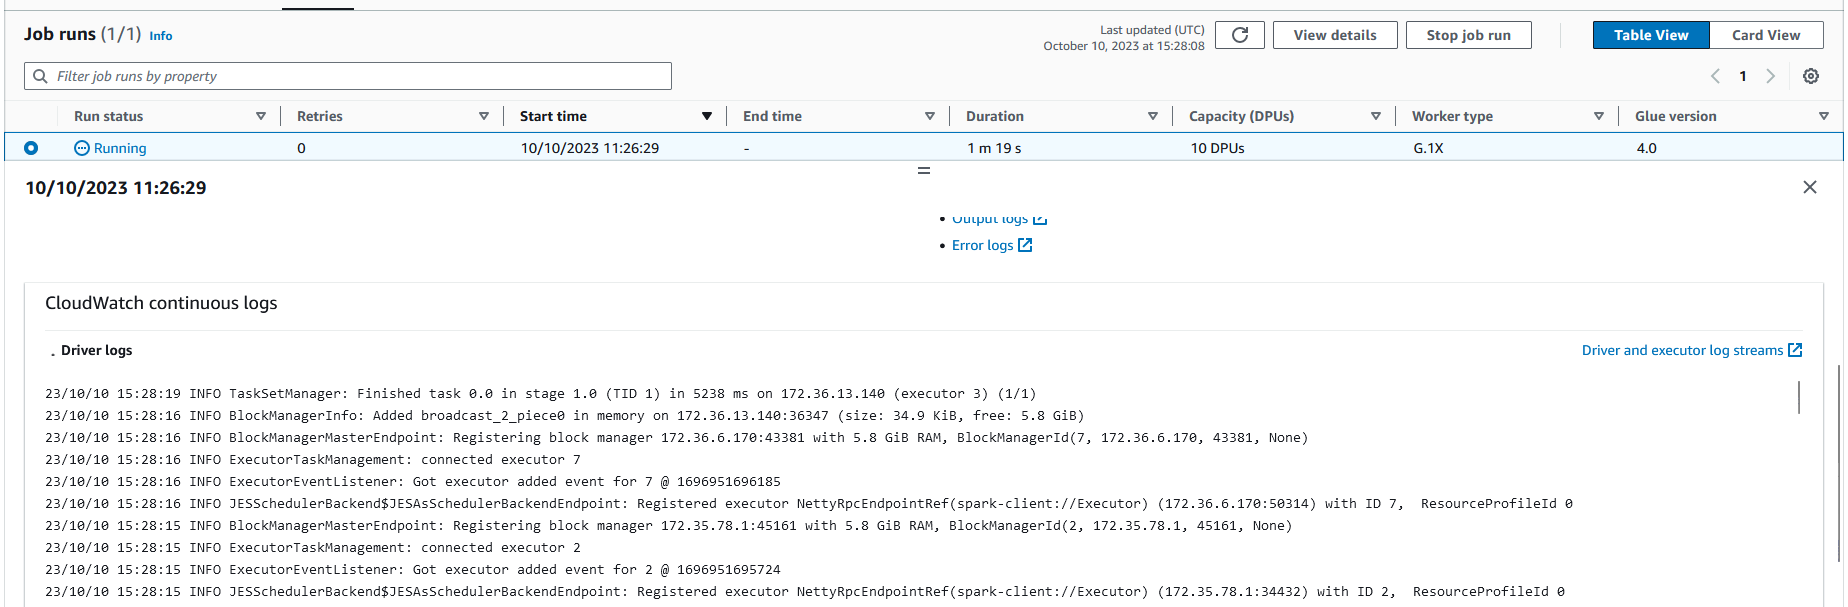
Once clicked, the job will automatically start running. A new entry in the table will appear and show the "Run status" as "Running." You can click on the run to see more information about the run and its status. If you scroll down, you can see the current logs for the run.
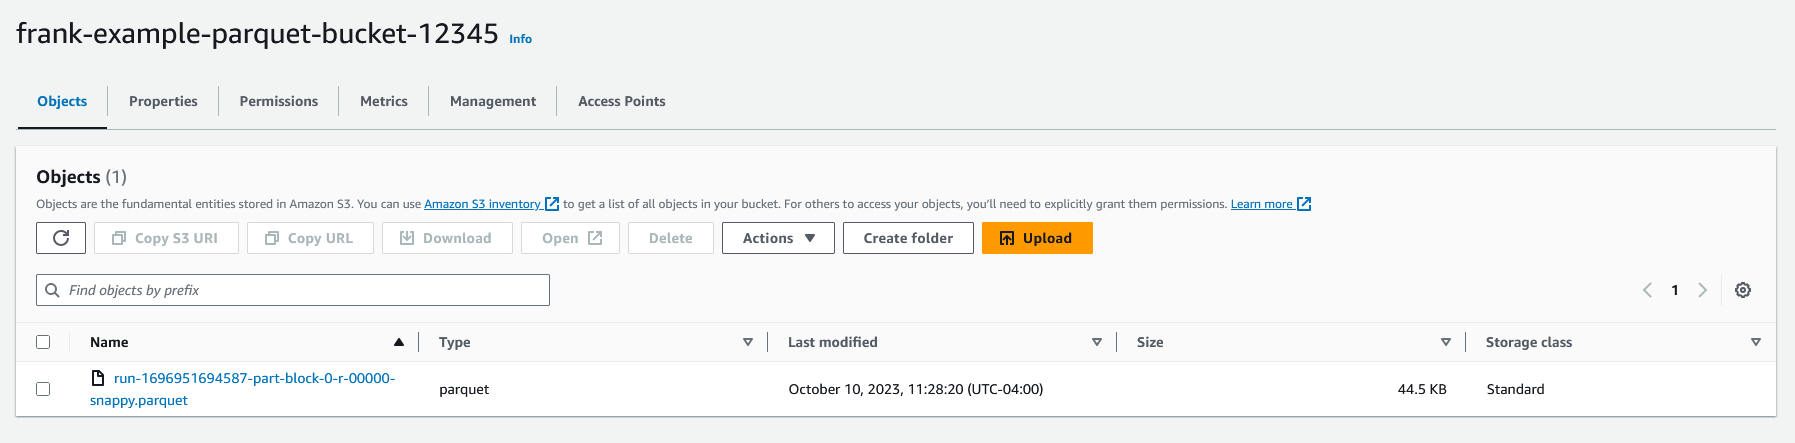
After a few minutes, the job will finish and this status will change to "Succeeded." We have now successfully converted our CSV file to Parquet! If we go to the s3 bucket we specified as the target, we can see the Parquet file.
We now have our Glue job all set up and working!
Next Steps
AWS Glue is a powerful tool that can be used for many different things. In this post, we created a simple ETL job that converted a CSV file to Parquet. However, you can do much more with Glue. For example, you can use it to join data from multiple sources, transform data, and even monitor the quality of your data.
A few things you can look into next with AWS Glue are:
- Explore how the Data Catalog and Crawlers work to automatically detect schemas and tables for all of your data sources in AWS
- Use a data source other than s3, such as Kinesis, Redshift, or RDS
- Join data from multiple sources
- Use a data connector to work with a non-AWS data source such as Snowflake
Similar Articles
How To Save Data From Help Scout’s API to CSV in Python
Learn how to download your conversations from Help Scout using their API and store them in a CSV file using Python.
Passing Credentials to AWS Lambda Using Parameter Store
Need to pass credentials or secrets to your Python Lambda functions?